
Your account may have been set up with sample data for a bike shop, bottle store, coffee shop, sports shop or salon, so you can explore Linx with realistic records. When you are ready to use Linx for real, clear it out in one step.
Warning: The purge deletes every record in the categories you choose, including records you added yourself. It cannot be undone. Nothing marks sample records as sample, so do this before you enter real data.
What the sample data contains
Sample suppliers, products, accounts, contacts, leads, opportunities, quotes, opening stock, purchase orders, sales orders, invoices and payments, plus notes and activities. For Point of Sale, it also seeds a default sell-screen layout with folder and product buttons, an enabled Main Register (REG-01) with Cash, Card, Gift Card and Account tenders, a closed shift and an open shift, completed and parked till sales, and an issued and partially redeemed gift card. Purging POS Sales Transactions closes the register and clears the sample till sales and shift history while keeping the register and layout configuration.
Warning: The sample register uses the free trial POS seat. If you keep it when you activate your subscription, that seat becomes billable even if you have only explored CRM. Purging sample sales does not prevent the charge. If you do not want POS, purge the sample till sales, then delete Main Register before activating. If you have already activated, also release the unused register seat.
Clear it
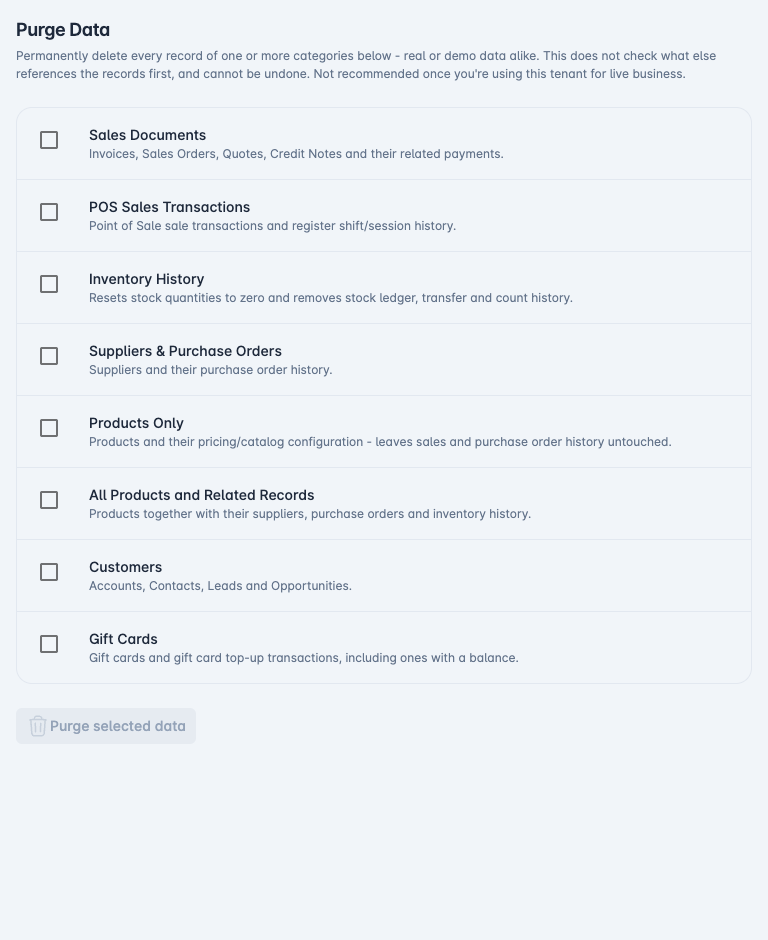
- Go to Administration → Preferences → Purge Data.
- Tick the categories to remove (see the table below).
- Click Purge selected data.
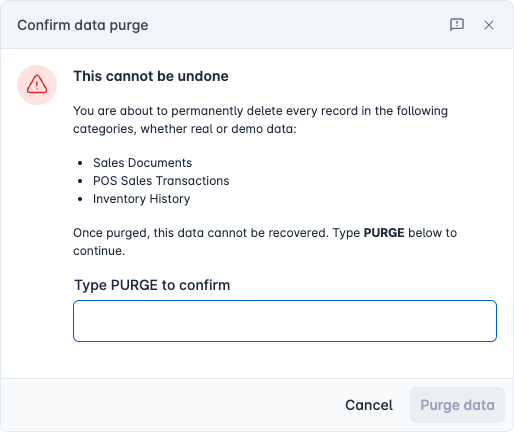
The Confirm data purge dialog lists the categories you selected. Check them carefully, then type PURGE (capital letters are not required) in Type PURGE to confirm. Click Purge data to proceed, or Cancel to leave without deleting anything.
You see Data purged once the selected categories have been removed.
| Category | What it removes |
|---|---|
| Sales Documents | Invoices, sales orders, quotes and credit notes, and their payments |
| POS Sales Transactions | Till sales and register shift history. The registers themselves stay, but they are closed |
| Inventory History | Sets stock to zero and removes the stock ledger, transfers and counts |
| Suppliers & Purchase Orders | Suppliers and their purchase orders |
| Products Only | Products. It fails if the products still have inventory history, so purge Inventory History first |
| All Products and Related Records | Products and everything that depends on them |
| Customers | Accounts, contacts, leads and opportunities, with their notes and activities |
| Gift Cards | All gift cards, including cards that still have a balance |
What is never removed
Users, business units, settings, roles and your entity setup are never purged. Document templates, including the eight starters installed in new workspaces, also stay: they are workspace setup, not sample sales records. They are included even when you choose no sample data. See Use and customise document templates.
Tasks and other activities that are not attached to a customer record you purged also stay.
Tips
- To start completely clean, tick everything except what you want to keep, such as products you set up yourself.
- The purge runs as a single step: either everything you chose is removed, or nothing is.
- Do it once, at the start. There is no option to remove only the sample records.